How to Assign Roles to Users or Groups
This guide provides a detailed, step-by-step process for assigning roles to users or groups within your organization's directory using the OfficeSeries application.
In OfficeSeries, roles determine what users or groups can access and perform within the system. Assigning roles is essential for managing permissions and ensuring that users have the appropriate access to resources. By assigning roles effectively, you can maintain security, compliance, and operational efficiency within your organization. Directory security and access control are critical components of managing user roles and permissions, particularly for organization-wide roles such as Global Administrator, Security Admin, and other roles that grant organization-wide permissions.
When to Use this Guide
This guide is specifically for assigning organization-wide roles such as Global Administrator, Security Administrator, and other roles that grant organization-wide permissions.
Prerequisites
Before you can assign roles to users or groups in the directory, ensure you have the necessary permissions to manage roles and access control within the OfficeSeries application. If you are unsure about your permissions, contact your organization's OfficeSeries administrator.
Steps to Assign Roles
1. Log into OfficeSeries
- Open your web browser and navigate to the OfficeSeries application URL.
- Enter your username and password, then click "Log In".
- If you have multi-factor authentication enabled, complete the additional verification steps.
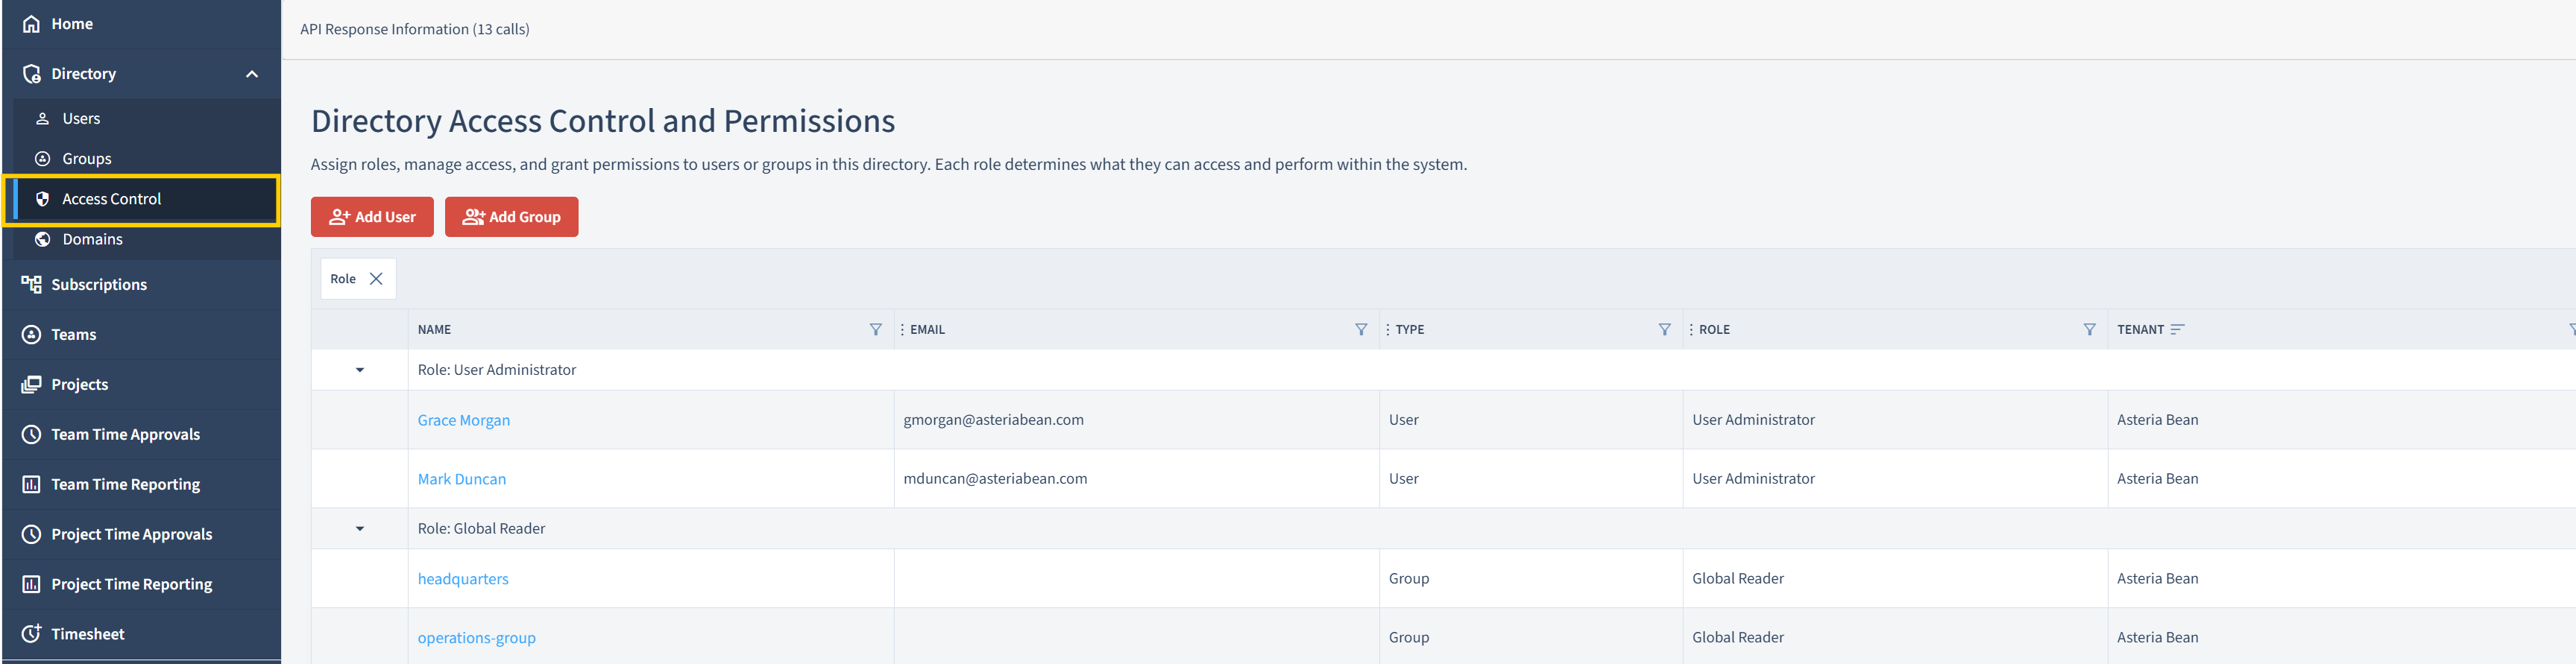
2. Navigate to the "Directory" Menu
- Once logged in, locate the main navigation menu, usually found on the left-hand side of the screen.
- Click on the "Directory" menu to expand its options.
3. Select "Access Control" Submenu
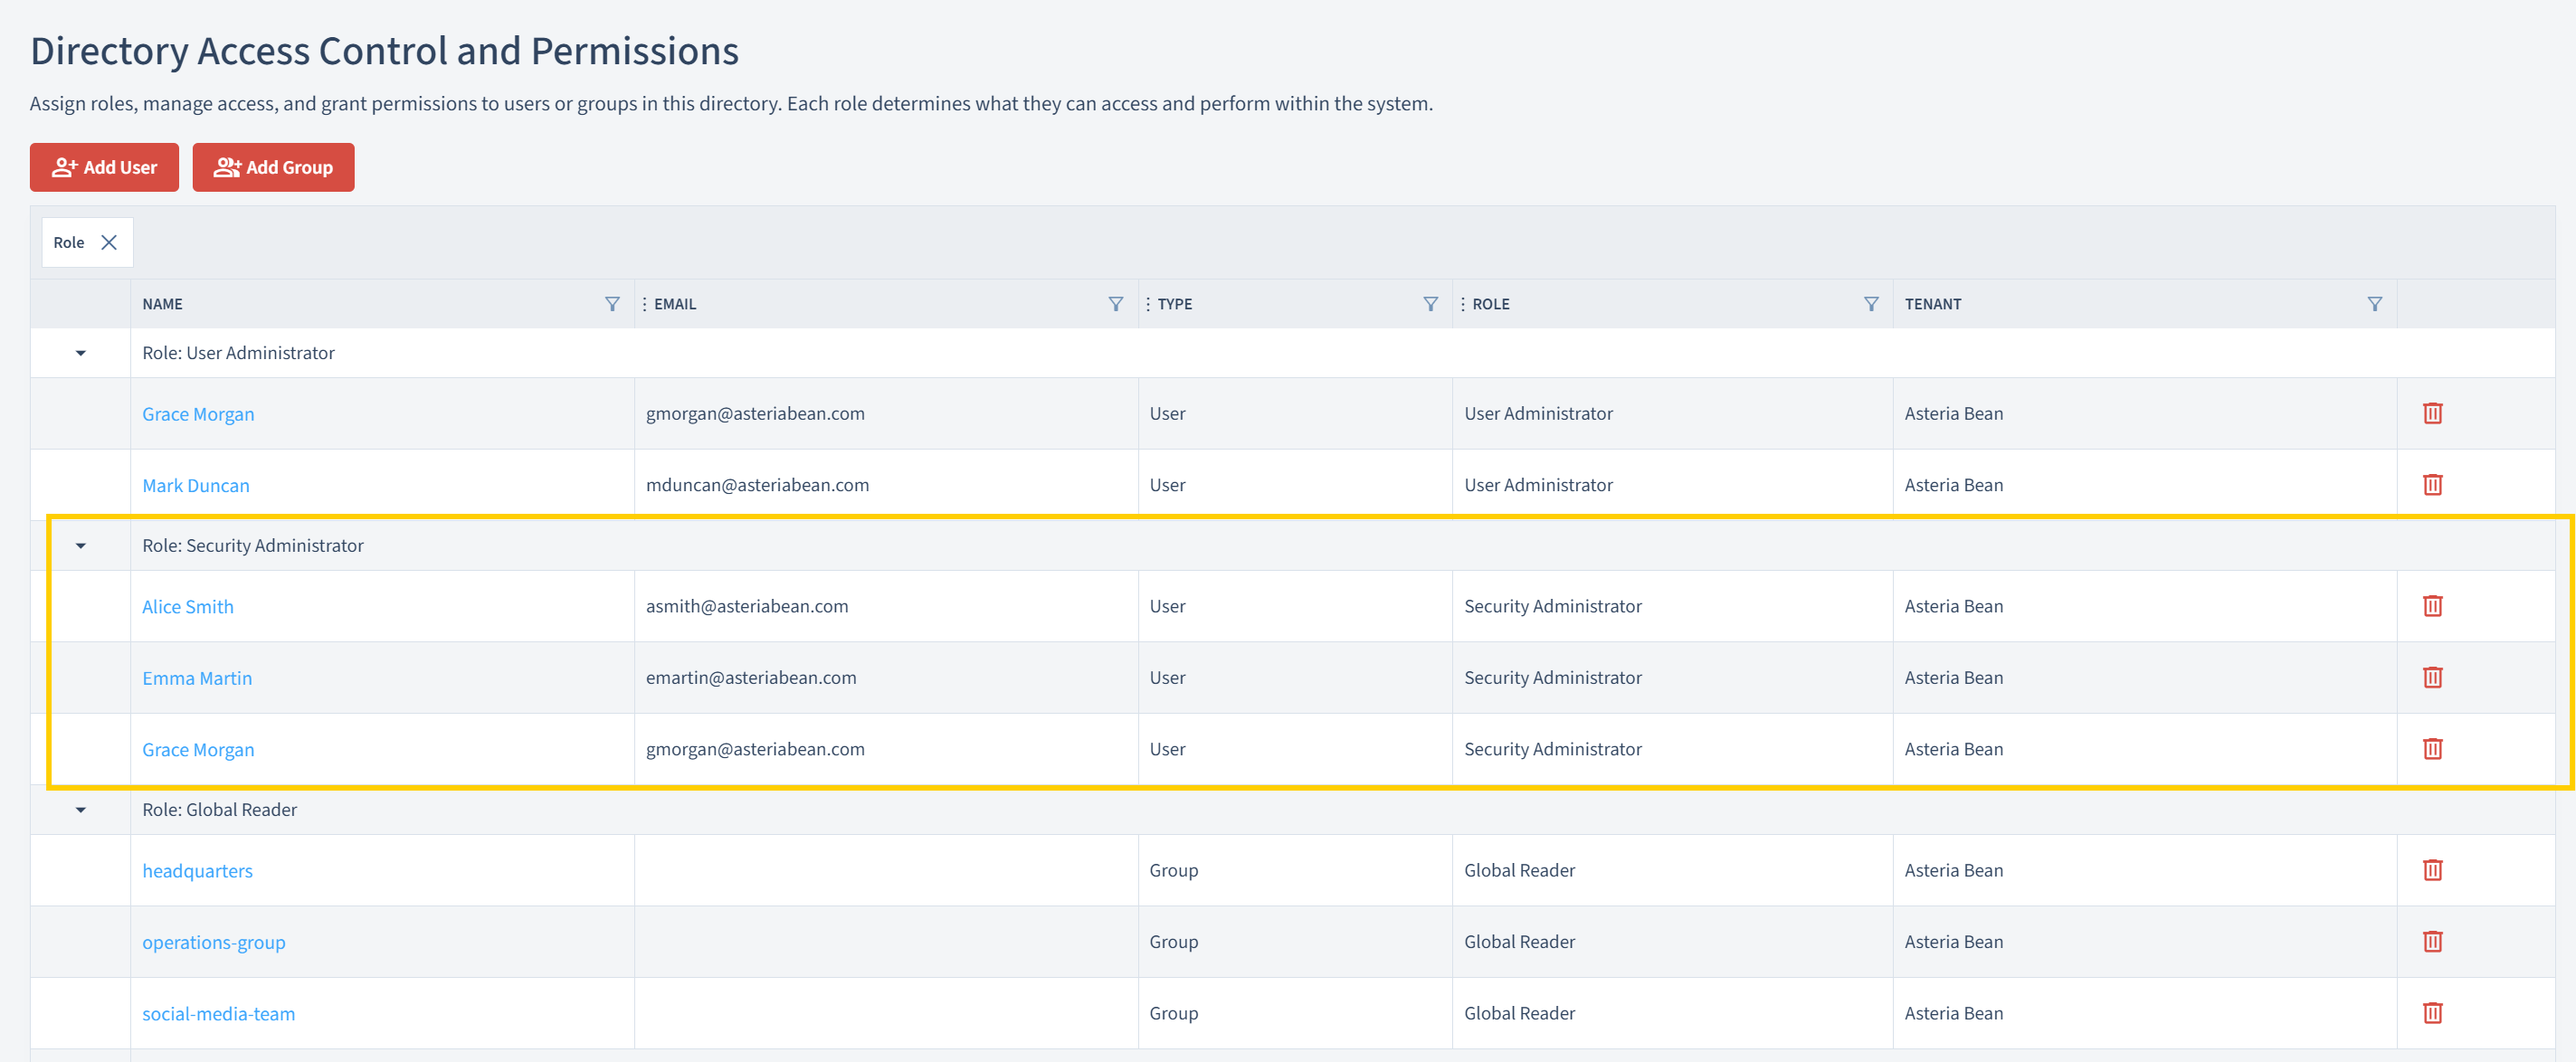
Within the "Directory" menu, find and click on the "Access Control" submenu.
This will take you to the Access Control management page, where you can view and manage roles and permissions.
4. Click "Add User" or "Add Group"
After navigating to the Access Control management page, you need to decide whether you want to assign a role to an individual user or a group of users. Click on the appropriate option (Add User or Add Group).
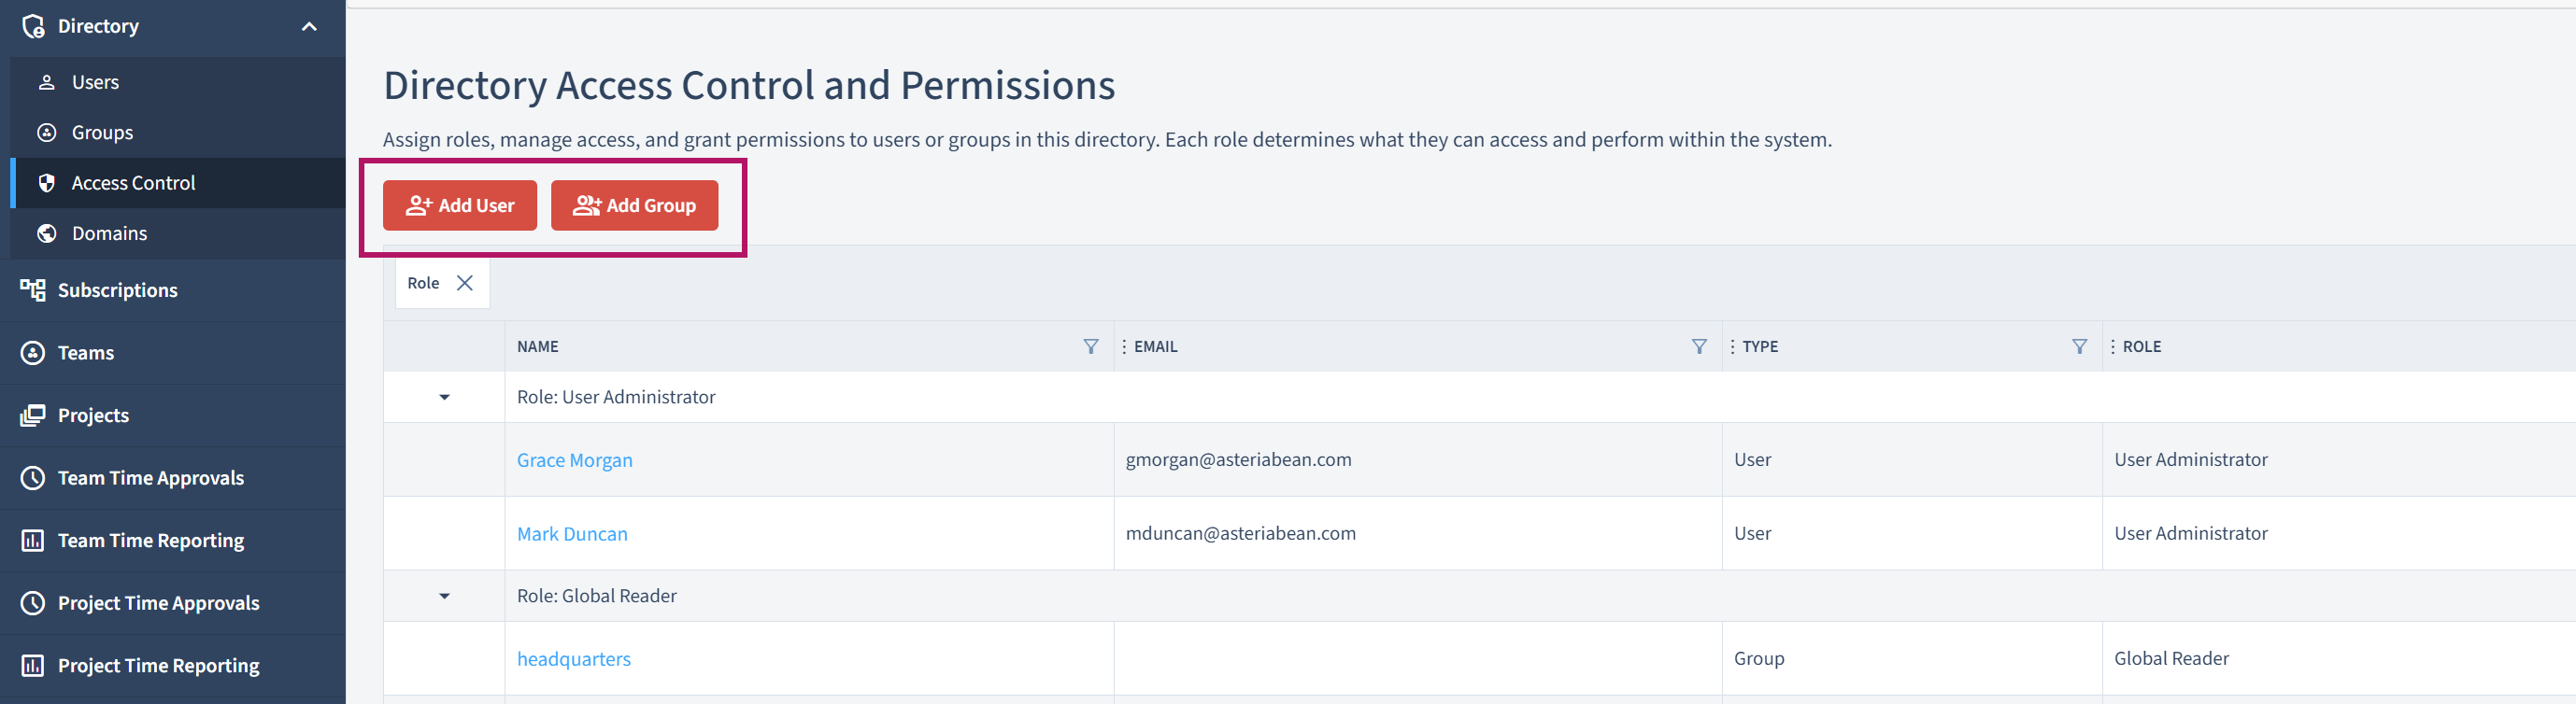
In the sample forward, let's try to navigate adding multiple users to the Security Administrator role.
5. Select Role
After clicking on the "Add User" or "Add Group" option, you will be presented with a list of available roles. Select the role you want to assign to the user or group from the list of available roles.
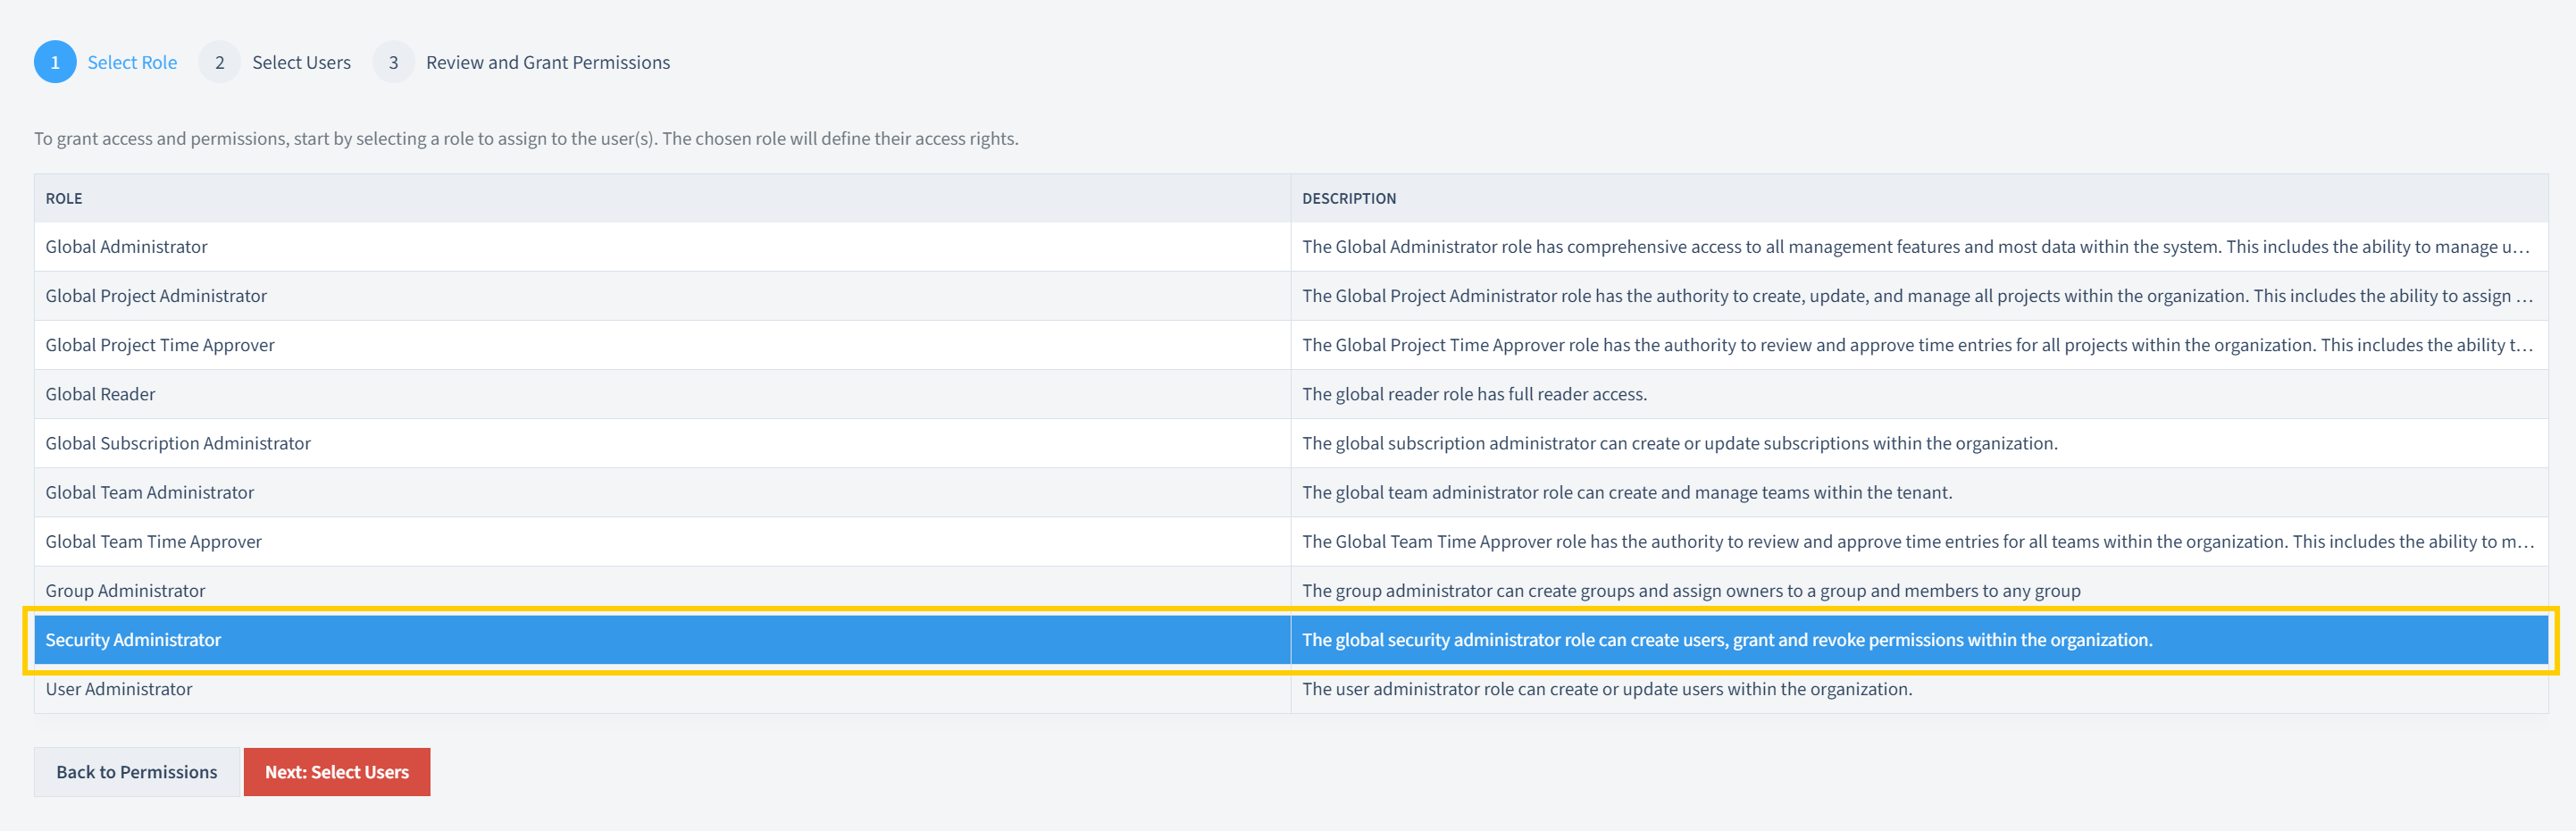
After selecting the role, click on Next: Select Users to proceed to the next step.
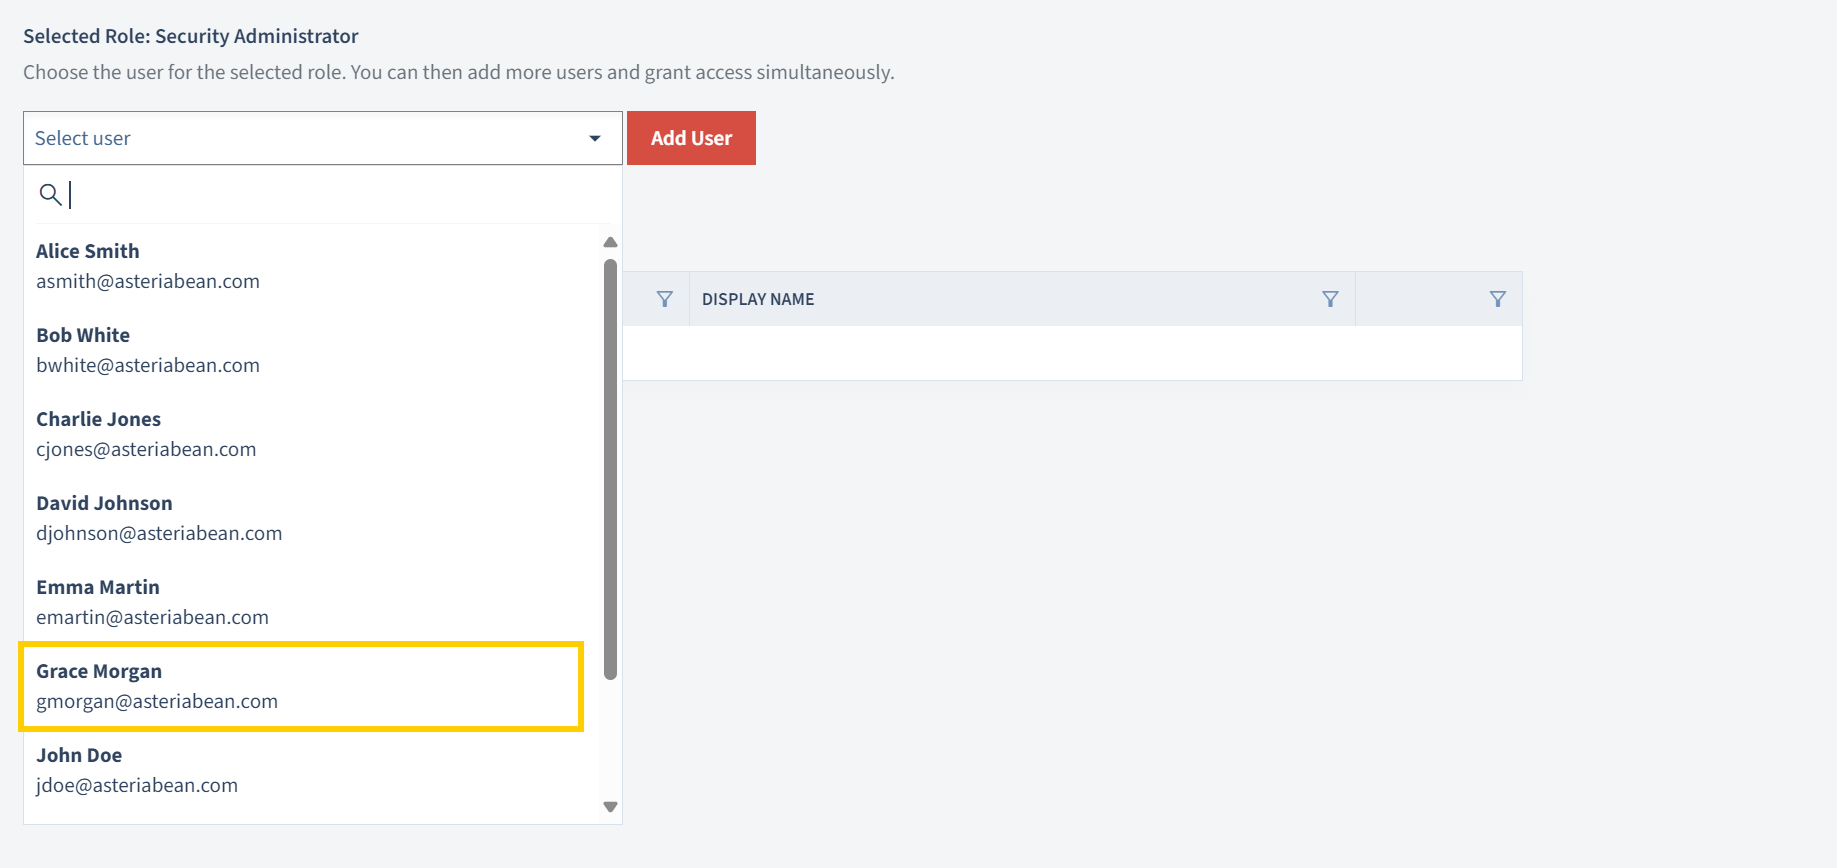
6. Select Groups or Users
In the group or user selection form, you will see a dropdown menu for a list of available options.
If you have selected "Add User", you will be prompted to search for and select the user to whom you want to assign the role.
If you have selected "Add Group", the dropdown will show you a list of groups in your organization's directory where you can assign the role.
Select the user or group from the dropdown list whom you want to add to the role selected by clicking on the name and the Add button.
Important: You can add multiple users or groups during role assignment.
Note: You may select multiple users or groups when assigning roles.
Multiple selections for users or groups are allowed during the assignment of roles. By clicking on the user or group name and adding them to the list of Selected Users/Groups before granting permission.
Please note that clicking "Add Users" will not automatically grant the selected users or groups the role. You will need to click on the "Next" button to proceed with granting permissions.
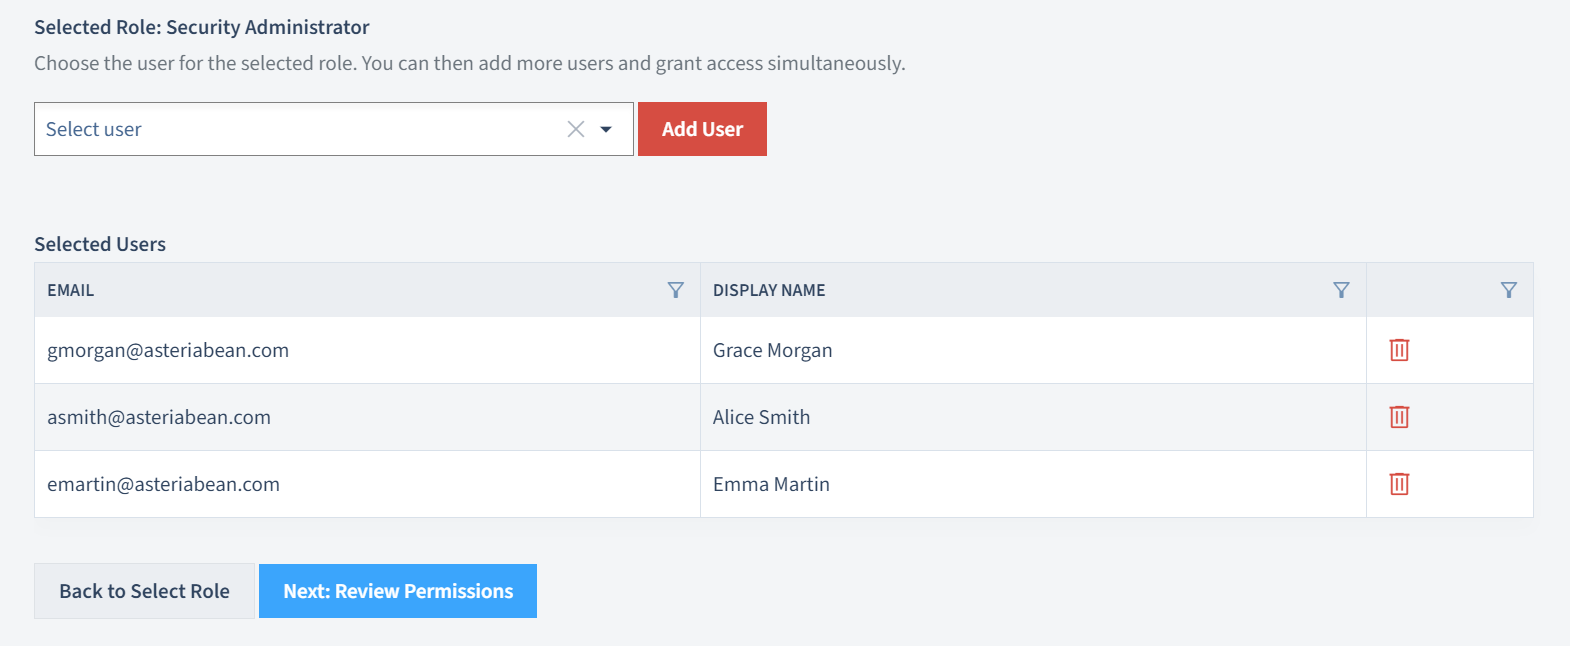
- After selecting the users or groups, click on the "Next: Review Permissions" button to proceed.
7. Review and Grant Permissions to a Role
- In the next step, you will see a summary of the role assignment, including the role name, the users or groups to whom the role will be assigned, and the permissions associated with the role.

8. Confirm and Save
- After reviewing the role assignment summary, click the "Grant Permissions" button to confirm and save the role assignment.
- This will route you back to the Access Control management page, where you can see the updated list of roles and permissions assigned to users or groups.
Best Practices
- Review Assigned Roles: Periodically review the roles assigned to users and groups to ensure they are still appropriate.
- Role Clarity: Ensure that the roles you assign are clearly defined and understood by the users or groups.
- Least Privilege Principle: Assign the minimum level of access necessary for users to perform their tasks.
- Regular Audits: Conduct regular audits of assigned roles to maintain security and compliance.
- Documentation: Keep a record of role assignments and changes for future reference and accountability.
Removing a User or Group from a Role
There are cases when revoking a role from a user or group is needed. You simply have to delete the user or group from the role.
When to Revoke or Change Roles
| Scenario | Description |
|---|---|
| Role Change | A user has changed positions within the organization and no longer requires the permissions associated with their current role. |
| Security Concerns | A user or group has been identified as a security risk, and their access needs to be restricted immediately. |
| Access Review | During a regular audit, it was found that a user or group has more permissions than necessary for their tasks. |
| Termination | A user is leaving the organization, and their access needs to be revoked to maintain security. |
| Project Completion | A user or group was assigned a role for a specific project that has now been completed, and the role is no longer needed. |
By following these guidelines, you can ensure that roles are managed effectively and that users have the appropriate level of access for their responsibilities.
How to Revoke or Change Roles (If Necessary)
If you need to revoke a role from a user or group, follow these steps:
- Navigate to the Access Control management page.
- Locate the user or group from which you want to revoke the role.
- Click the delete icon next to the user or group.
- Confirm the action by clicking "Ok".
Summary
This guide has provided a comprehensive, step-by-step process for assigning roles to users or groups in the OfficeSeries application. By following these steps and best practices, you can effectively manage access control and ensure that users have the appropriate permissions to perform their tasks.